Monday, 9 May 2011
HD Test -
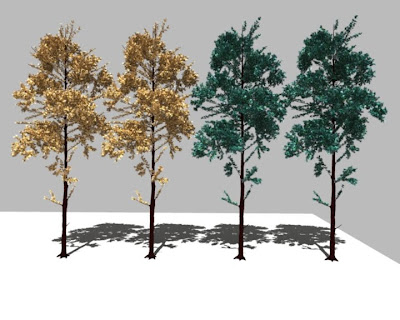
First test of 1080p with AO! No clouds... because they're not in my dropbox 8E
This image is a .jpg.. and shrunk/ compressed slightly... for blogspot...
*ahem*
Saturday, 30 April 2011
Thursday, 21 April 2011
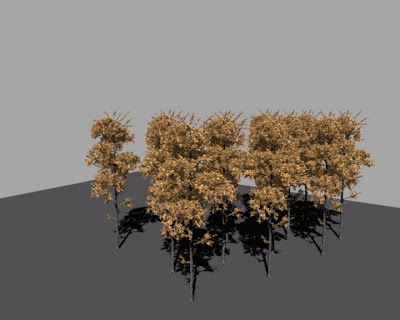
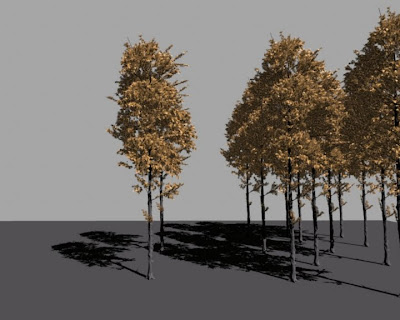
lighting trees
top no transparency on leaves.
bottom with transparency.
both with leaves cut out to allow light through in patches.
thoughts?
Tuesday, 5 April 2011
Backup :~
int $i;
// the starting TreeType1Proxy
int $treeNum = 103;
for($i=1; $i<=1035; ++$i)
{
// create a new locator and point constraint it to a PlaceholderTree.
spaceLocator -p 0 0 0;
eval("select -r PlaceholderTree" + $i);
eval select -add locator1;
doCreatePointConstraintArgList 1 { "0","0","0","0","0","0","0","1","","1" };
pointConstraint -offset 0 0 0 -weight 1;
// get the x, y, z coords for the locator. Set these to proxyTx, proxyTy and proxyTz variables.
float $proxyTx = eval("getAttr locator1.tx");
float $proxyTy = eval("getAttr locator1.ty");
float $proxyTz = eval("getAttr locator1.tz");
// generate a "random" number for use as the y axis rotation for the new tree
float $randomRot = rand(0 - 360);
// duplicate the last tree
eval("duplicate TreeType1Proxy__" + $treeNum);
// increment treeNum to the duplicated tree
++$treeNum;
// select the new tree and then move this to the position of the locator and rotate the in the y axis
eval("select TreeType1Proxy__" + $treeNum);
move $proxyTx $proxyTy $proxyTz;
rotate -p 0 $randomRot 0;
// delete the locator
delete locator1;
}
int $a;
int $i = 1;
for($a=1; $a<=21; ++$a)
{
select -r EnvGroundTarget EnvGroundFlat ;
blendShape -frontOfChain;
int $j;
eval("select -r PlaceholderTree" + $i);
++$i;
for($j=1; $j<=49; ++$j)
{
eval("select -tgl PlaceholderTree" + $i);
++$i;
}
select -tgl EnvGroundFlat;
CreateWrap;
setAttr "blendShape1.EnvGroundTarget" 1;
DeleteHistory;
setAttr "blendShape1.EnvGroundTarget" 0;
DeleteAllHistory;
file -force -save -options "v=0";
}
quit()
Wednesday, 30 March 2011
Fixing the trees!
So... I manged to write a mel script that will fix the tree issue for us.
It took... a good few hours of googling, trial and testing, of different methods that I could think of, and work out the syntax for. @_____@
The method I made work, (and is actually the simplest) basically goes through every tree and sets the bounding box type and then the file location for the mental ray proxy.
Here it is:
int $i;
string $filePath = "scenes\ShapeTestMI.mi";
for($i=1; $i<=865; ++$i)
{
eval("setAttr TreeType1Proxy__" + $i + ".miUpdateProxyBoundingBoxMode 1");
eval("setAttr TreeType1Proxy__" + $i + ".miProxyFile -type " + "\"string\"" + " $filePath");
}
I'll set this up when I get into University, but i'm putting it up here incase you need it sooner.
Change "scenes\ShapeTestMI.mi" to the file location.
Change 865 in "for($i=0; $i<=865; ++$i)" for additional trees.
ALSO! TreeType1Proxy__27 and 28 are missing, and will cause the script to stop.
So duplicate and rename two trees to 27 and 28 to solve this.
Monday, 28 March 2011
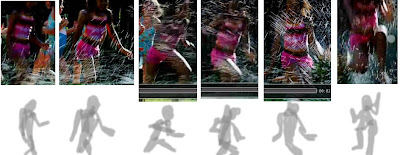
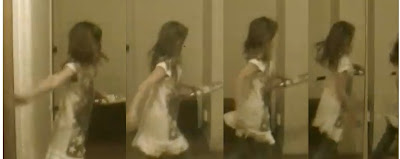
interblag Motion Refrence
girl happy running
girl happy walking
girl pushing
girl running (young)
girl running (football)
girl running (sprinkler)
girl jump (weird angle)
3 girls running and jumping through sprinkler
link to my motion reference
girls jumping off a wall
girl and toddlers running and skipping
boy jumping
boy running
Thursday, 24 March 2011
Geometry Proxies!
Each tree has a really high polycount (18k for the trunk.. and something silly... for the leaves). Placing all the trees as they are in the scene would explode the world.
I found two ways in which you can make "proxy" geometry for mental ray in maya, that gets rendered as the real geometry, but means you can have each tree as low a 1 polygon in the scene, for animating.
One way uses a proxy geometry shader, using the mental ray "mip_binaryproxy". I found this first.. and it took a while to work out how to actually get access to it, as it is part of the mental ray production shaders which are hidden by default.
http://www.pixelcg.com/blog/?p=586 - Link to a video on this.
This blog is full of videos, many about the mental ray production shaders.
Another way is to export the real mesh as a .mi file (some mental ray thingy) and then under the mesh shape node (that you're using as a proxy) set the mental ray "Render Proxy (Assembly)" to the exported .mi file.
http://download.autodesk.com/us/maya/2010help/index.html?url=WS1a9193826455f5ff6026605b11840df46315041.htm,topicNumber=d0e588348
-There is the link to the documentation if you want it.
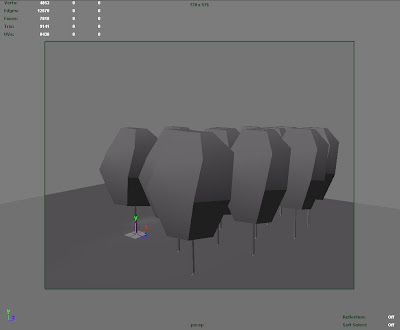
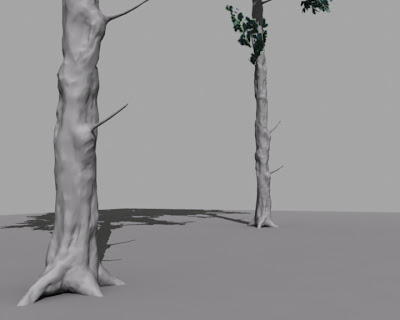
Below are the images of the proxies in action.
The roots of the proxy tree are pretty close to the original model (i decimated them to a lower polycount) while the rest of the tree is pretty much a box.
Trees... but not quite pine trees
So... these trees have been a real headache, and very time consuming for me. I tried a few different ways to create pine needles, but the trees look very bare unless i have them in a very high number. Which is fine.. but with pine needles you can tell when they're not facing in the right direction or not connected to a branch, which isn't practicle when placing them. I don't know if there are any scripts of programs that we could use; i've spent a lot of time looking.. but nothing has worked so far.
I've instead created some trees (which look more like my original consept) using "oak leaves" <- its a texture and shader from maya, and can be changed, but a leaf is much easier to place than a pine needle/branch.
I was able to use the geometry paint tool to paint the leaves on to planes that i placed where the branches were, and i also used the leaf layout from some of the paint effect oak trees. This is what i've created.
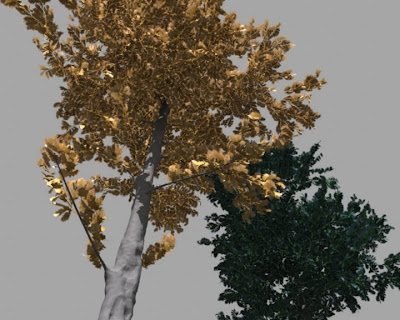
I've modified the default leaf shader slightly, and did some quick renders.
This is the new tree trunk that I used the decimation master on, and also applied a normal map (WHICH I FINALY GOT WORKING AFTER FINDING OUT HOW TO MAKE THEM IN MAYA!)
The lighting is a bit blerg, and the shader needs modifying.
Sunday, 20 March 2011
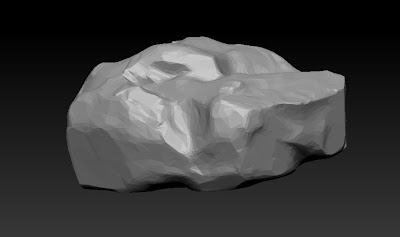
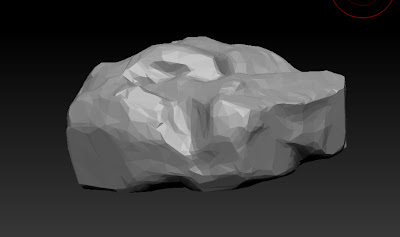
Zbrush Rocks,.. Decimated
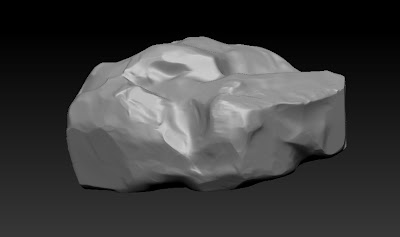
I was trying out the best way to creat some large rocks to place in the forrest.
I used the zbrush decimation master :
The first image is 1.3? million poly, the second is 6k and the third is 1.5k
(i also have a 3k version)
You can render these in maya, and with the mental ray approximation editor have them subdivided during rendering, which makes them look pretty close to the 1.3millon version.
Saturday, 19 March 2011
Wednesday, 16 March 2011
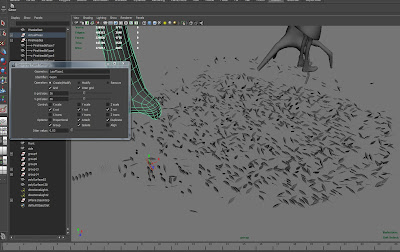
I found a "Geometry Paint" plug-in for maya. It's part of the Bonus Tools autodesk made, which you have to install... which took me ages to get to work 8E.
Its basically like the paint effects tool, but for custom meshes.
http://area.autodesk.com/bonus_tools <- link to the download
I tried it out on a plane (above)(the plane is hidden).
We can use this to populate the ground folliage, and the leaves/needles on the trees.
Do you want pine trees with real leaves or with pine neeedles? I can look more into how to paint textures on the planes for this.
I also found a script, which was for leaves created by paint effects trees, that changes the UV layout of the leaves, so that you can have different textured leaves.
http://www.djx.com.au/blog/2011/03/10/maya-paintfx-leaf-uv-layout-script/ <- linky to that.
Tuesday, 15 March 2011
Thursday, 24 February 2011
The Rig
Ok cats, the rig is (hopefully?) complete and is now ready to start animating with. However because there will invariably be problems withe the weights that will need to be adjusted, we are going to use a system of referencing the rig within the animation scenes so that I can continue working on it - and then my changes will be updated into the animation. To do this is very simple.
- Open the scene into which you want to animate, complete with all the files you are going to need except the rig.
- Click File > Create Reference
Select the rig file and reference it into the scene.
- Do your business.
When an updated rig is available you can update the rig you have been working on by clicking
- File > Reference Editor
Select the object you want to update, click the "reference" menu at the top and then click Replace Reference.
BOOM. You win. The rig should be updated and your animation should remain unchanged - though I recommend before/after saving to make sure.
Coolio.
XX
Wednesday, 23 February 2011
Tuesday, 22 February 2011
font- houdini to maya
Exporting:
when exporting you have to modify to frame range and choose the appropriate frame range.
managing more than one font file in maya:
you have to rename each fbx file and font geometry once it is imported.
to modify the frame range click on the geometry and go to the channels editor, where you can see the fontCache change the 'start frame' to change where the animation starts, and you can change the scale to change the speed.
Monday, 21 February 2011
lighting tests
1 point lights with noise for fire
2 image based lighting
3 speckled area light
4 speckled area light and spotlight for extra shadows
Sunday, 20 February 2011
Saturday, 19 February 2011
Friday, 18 February 2011
Thursday, 17 February 2011
Monday, 14 February 2011
Thursday, 10 February 2011
Wednesday, 9 February 2011
Tuesday, 8 February 2011
Tuesday, 1 February 2011
Saturday, 29 January 2011
Tuesday, 18 January 2011
by the end of january.
Steve
Everybody
- model phoebe,
- points of interest
- geography of environment
- rough boat
- grass fur
- sail cloth
- pipeline
- music to dave ashley
- video reference
- animatic
- script
- rough lighting
- matte painting
- geographic plan
- rig benjy and phoebe
- animatic
- lighting
Everybody
- animatic
Thursday, 13 January 2011
Subscribe to:
Posts (Atom)